Hi everyone, it’s Lea! In my house, the moment the pegboards and little beads come out, someone always shouts “a Mario!” And honestly, I get it: our moustachioed plumber and his whole crew were born as pixels, so they’re an absolutely perfect match for fuse beads. Every square on the grid is simply one bead. It’s almost as if Nintendo designed these characters with our pegboards in mind! Today I’ve gathered more than fifteen designs I’ve spotted on my crafty wanderings, plus two little grids I made myself. Grab your apron, we’re off to bead the Mushroom Kingdom.
Mario, Luigi and the whole gang
Let’s start with the stars, of course. This lovely board brings together Mario, Princess Peach, the invincibility star and a Piranha Plant, so you can set the scene from your very first pegboard.

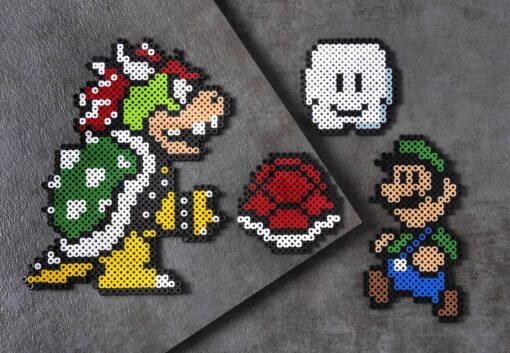
We can’t forget his big brother! This tall, lanky Luigi, with his blue overalls and soft green cap, is great practice for working with several shades at once.

Crafting with younger children? This “mini” version of the two brothers is done in a flash and makes brilliant keyrings to clip onto a school bag.

Peach, Toad and the castle crew
Princess Peach and her friend Daisy bring all the colour of the castle: candy pink, sunshine yellow and a pretty crown. This is a design my girls fight over.

Here’s little Bowser Jr. next to an adorable Toad. Two different sizes on the same board, ideal for keeping two children busy side by side without squabbling.

Koopa Troopa and his green shell round out the group. That rounded shape is perfect for learning to follow a curved outline, bead after bead.

Wario, Bowser and the troublemakers
Every good universe needs its rascals! Wario and Waluigi, with their bold colours (yellow, purple, contrasting overalls), are a joy to bead and make a nice change from the heroes.

Let’s take a little detour to the jungle with Donkey Kong and Diddy Kong. Their warm browns and that little red tie give a truly adorable result.

And because a scene is nothing without its obstacles, here are the mushroom and the famous Piranha Plant popping out of its pipe. Two classics to keep on hand.

The iconic items: mushroom, star, fire flower…
What I love most about Mario are the items! They’re small, quick to make and perfect for using up leftover beads. Let’s begin with the must-have golden “?” block.

The fire flower, with its red and white petals, is a lovely symmetry exercise for children who like everything neatly lined up.

The gold coin is THE express design: a handful of yellow beads and you’re done. Make a whole pile of them to decorate a garland.

Fancy going three-dimensional? This green pipe is built by joining several pegboards together, a satisfying little challenge for older crafters.

And for a fun touch, Lakitu’s cloud with its grumpy little face. It will float beautifully above a shelf.

If you’d like to see it done for real before you dive in, this video walks you through beading a few Mario designs step by step:
Two little home-made grids to get started
For those of you who prefer following a ready-made chart, I’ve put together two little grids of my own: one square = one bead, all you have to do is copy them across. First the red mushroom, the very first design I recommend to beginners.

And to finish in style, the invincibility star in yellow: just a few rows and a guaranteed wow effect.

Over to you!
That should keep you busy for many a rainy afternoon! My advice: start with a simple item (the coin, the mushroom) to build confidence, then tackle a full character. And if you love the pixel-art world, take a look at our Sonic fuse bead selection and our retro video game designs to keep the game going well beyond the Mushroom Kingdom. Above all, send me photos of your creations, I love seeing them. See you very soon, Lea.