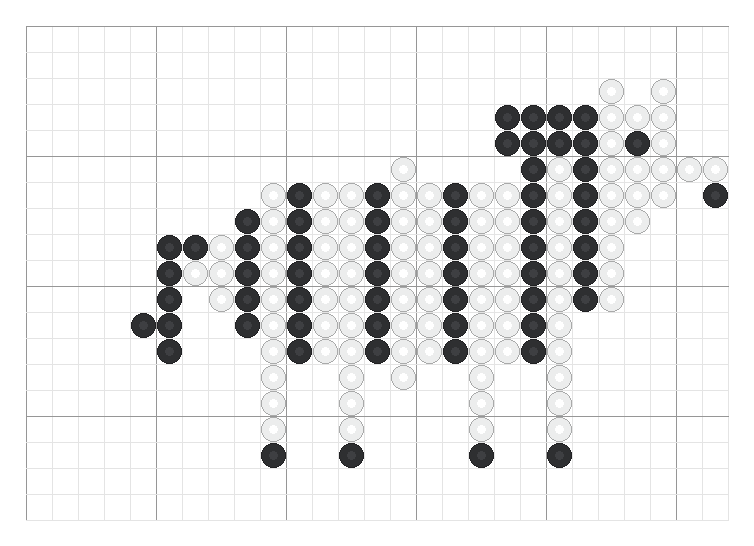
I’ve had a soft spot for zebra stripes for a while, so here’s my little zebra, standing on all four legs and ready to trot off! On the grid, 1 square = 1 bead: lay down the whole white body first, then add the black stripes one by one, nice and even. The mane and tail finish off the pattern, and a small black eye brings your zebra to life.
To keep the stripes crisp when ironing, go easy on the pressure and check underneath regularly so every bead has melted without going further than that. Once assembled, this little zebra makes a lovely decoration for a kid’s room, or a fun shape to glue onto a card for young fans of the savannah and wild animals.